Android support has been on our to-do list for a long time. A phone and a wireless biosensor are a natural combination: connect a headset, collect data, and build something useful around it. We wanted that workflow to feel familiar to anyone who already uses BrainFlow on a computer.
With BrainFlow 5.23.0 and the updated BrainFlowAndroidTest project, that long-standing item is finally here. You can build an Android app using the same BrainFlow Java API for acquiring and processing biosignals, with an Android library package that includes the native dependencies.
Let’s use the example to go from a fresh checkout to streaming EEG and movement data on a phone, then look at the small pieces you can reuse in your own app.
Which Devices Are Supported, and Which Have Been Tested?
Android support covers all BLE devices and all TCP/IP devices already supported by BrainFlow. Devices that require a serial port are not supported on Android.
| Connection used by the BrainFlow board | Android support |
|---|---|
| Bluetooth Low Energy (BLE), using the phone’s Bluetooth adapter | Supported |
| TCP/IP networking | Supported |
| Serial port, including USB serial adapters and Bluetooth SPP exposed as a serial port | Not supported |
The connection type matters. A wireless device using Bluetooth SPP is still a serial-port device in this context. Similarly, use a native BLE board profile, not an older BLED112 dongle profile.
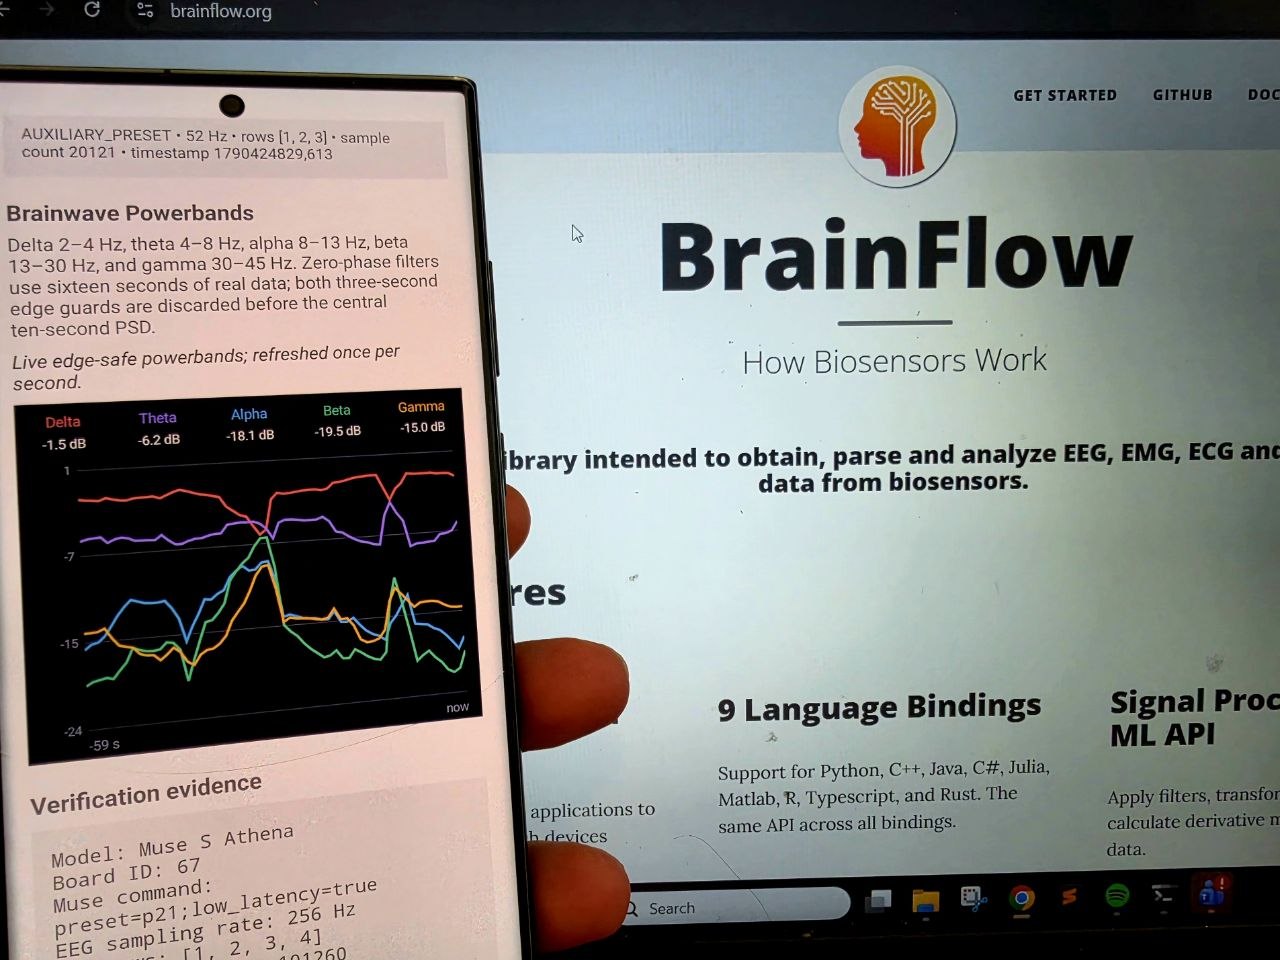
The example exposes three hardware-tested profiles: Muse 2, Muse S, and Muse S Athena. Its validation notes document the latest run on September 26, 2026: a Muse S Athena connected to a Samsung Galaxy S23 Ultra running Android 15, receiving EEG at 256 Hz and accelerometer data at 52 Hz, producing all five power-band traces, and stopping and releasing the session cleanly.
Those are the example’s tested devices; the broader BLE and TCP/IP support scope does not mean every board has been individually tested with this app. For another board, use its connection settings in the supported-board documentation.
1. Build and Run the Example
You will need Android Studio, Android SDK Platform 37 and Build Tools 37.0.0, and a compatible JDK. The project’s Gradle wrapper was verified with JDK 21; the app uses Java 17 bytecode. To try the BLE workflow, use a physical Android 12 or newer phone with Bluetooth LE and a powered-on Muse.
git clone https://github.com/brainflow-dev/BrainFlowAndroidTest.git
cd BrainFlowAndroidTest
Open the project in Android Studio, let Gradle sync, select your phone, and run
the app configuration. For a command-line build on macOS or Linux:
./gradlew testDebugUnitTest lintDebug assembleDebug
On Windows PowerShell:
.\gradlew.bat testDebugUnitTest lintDebug assembleDebug
The APK is written to app/build/outputs/apk/debug/app-debug.apk. The repository
already includes app/libs/brainflow-android.aar, so building this example does
not require compiling BrainFlow or installing the Android NDK.
Once the app is installed:
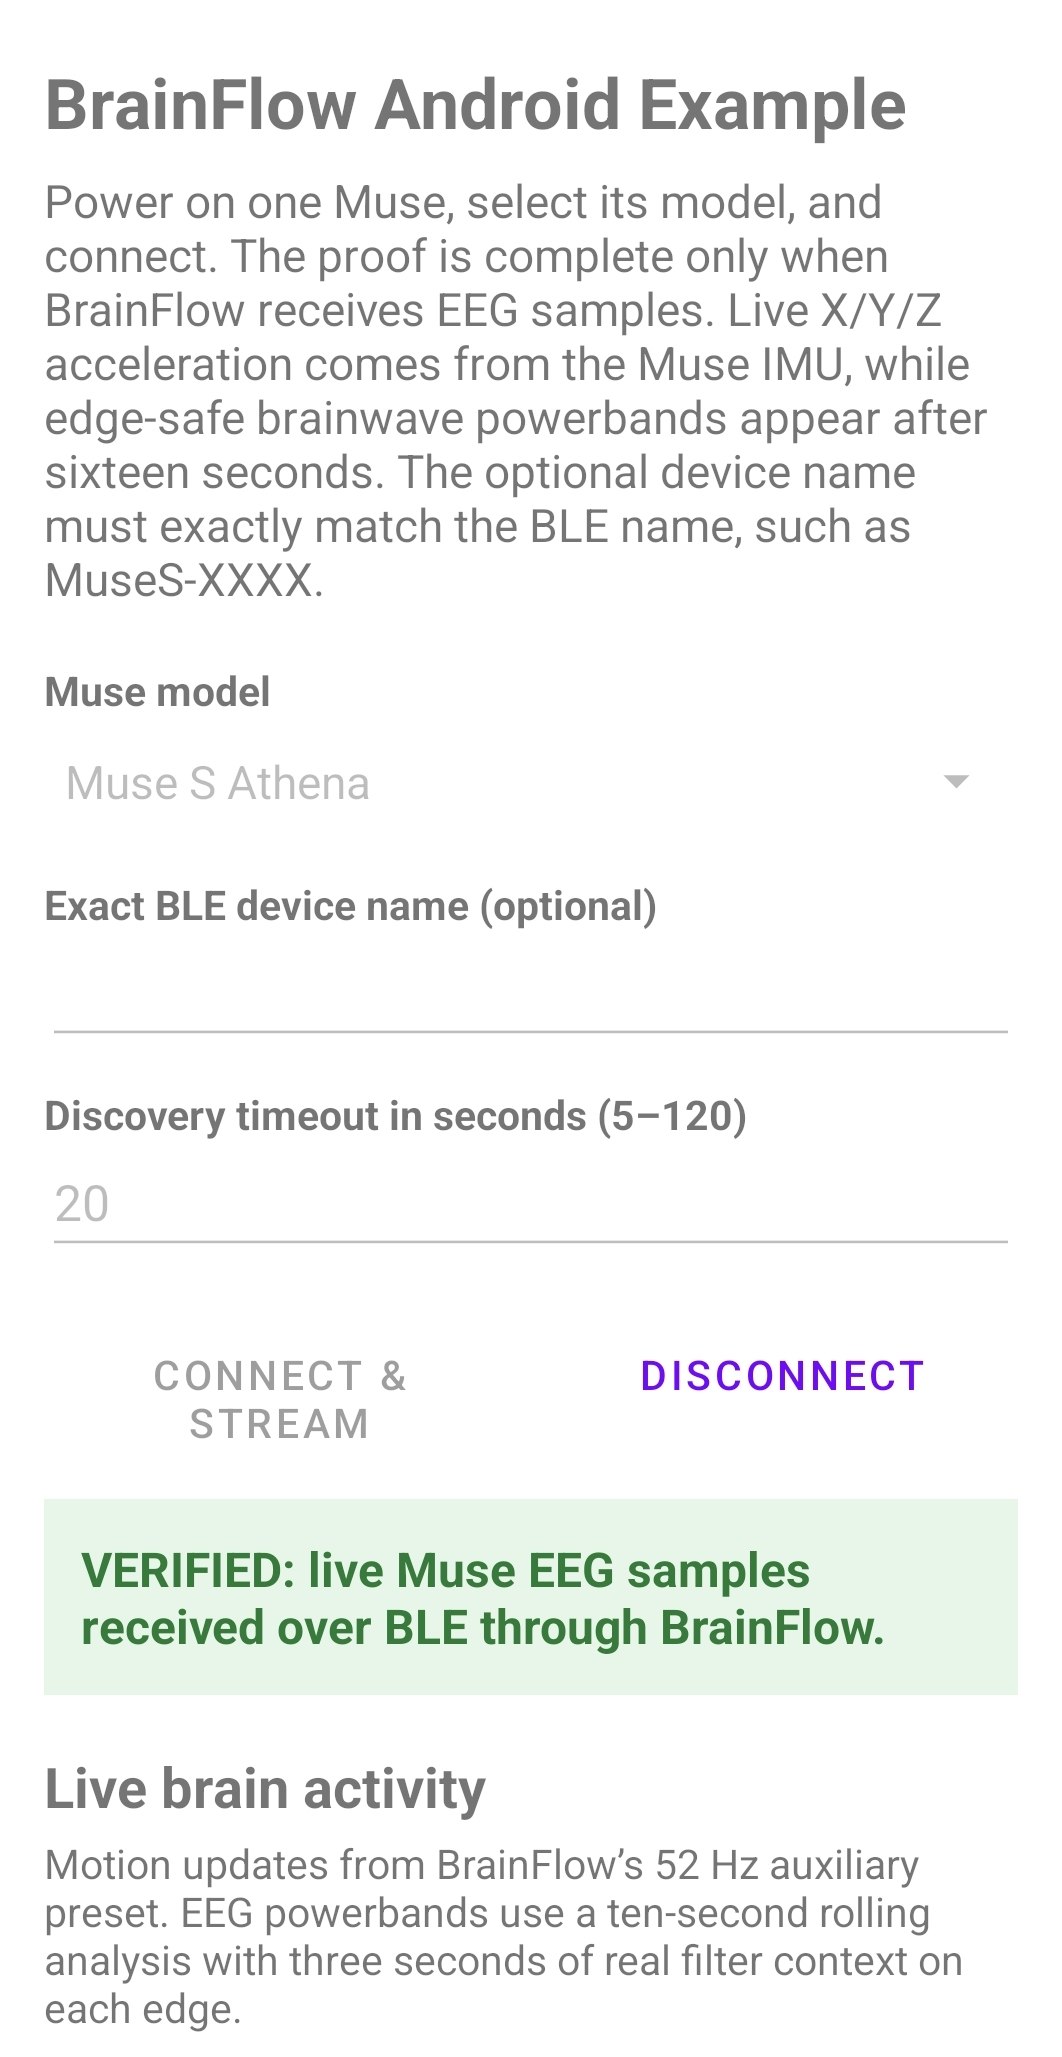
- Close other apps connected to the Muse, turn on the headset, and enable the phone’s Bluetooth.
- Open BrainFlow Android Example and grant Nearby devices access when requested.
- Select your exact Muse model. Optionally enter its advertised BLE name, such
as
MuseS-XXXX, to select a particular headset. - Tap Connect & stream. Check that EEG sample counts, timestamps, and values keep changing. Gently moving the headset should also change the X/Y/Z readings.
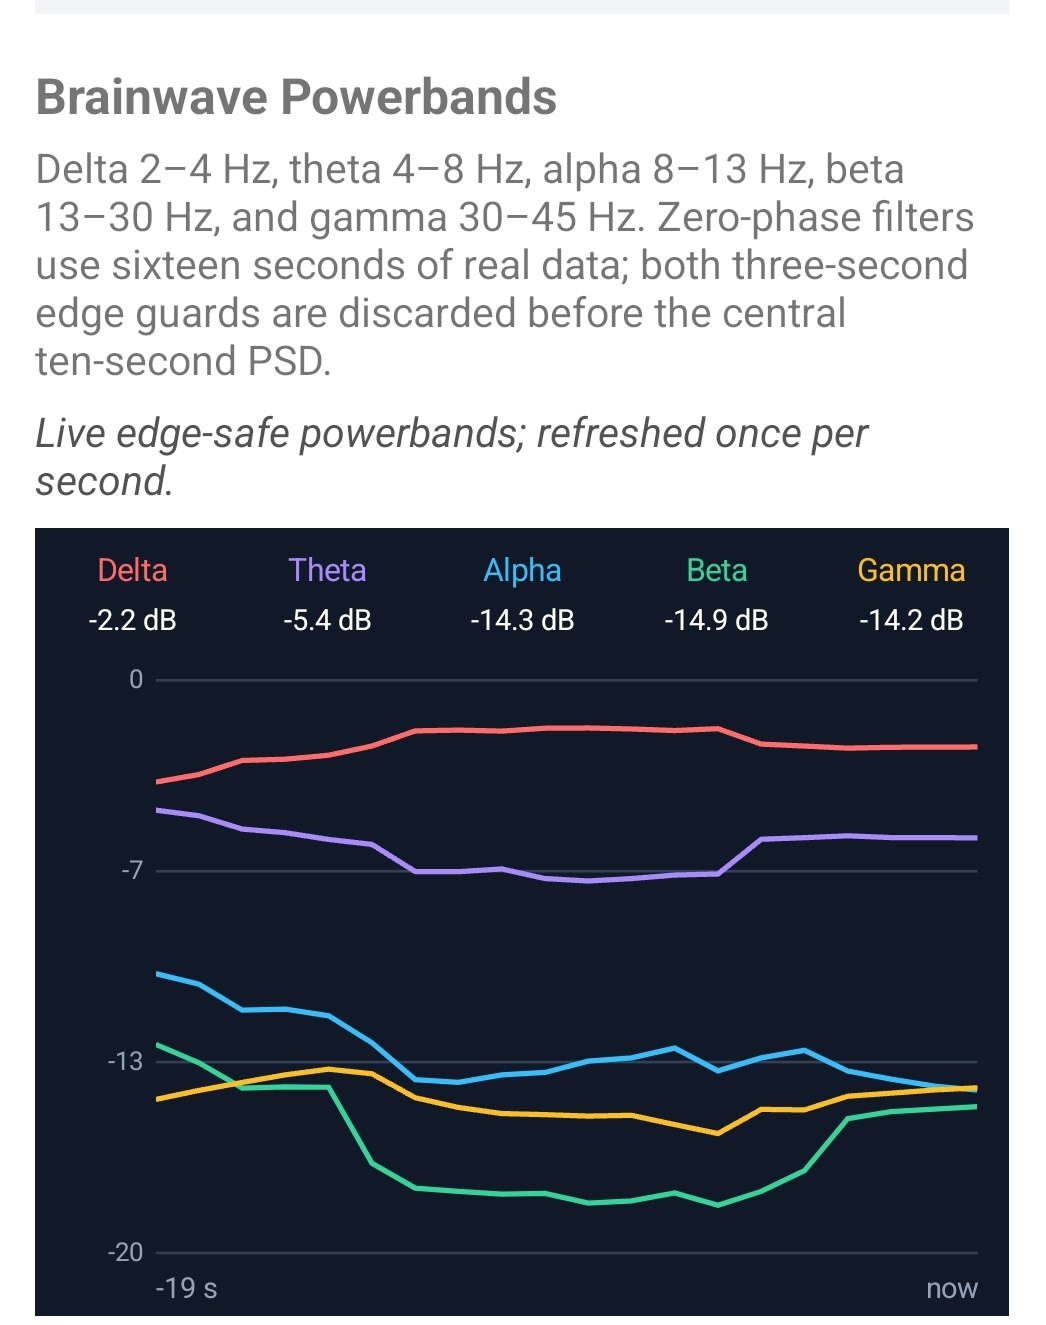
- Stay connected for at least 16 seconds to see the five power-band traces, which then update about once per second.
- Tap Disconnect and check the log for stream stop and session release.
The useful milestone is receiving samples. Successfully connecting to a headset alone does not prove that its data is streaming.
2. Add BrainFlow to Your Own App
An AAR is an Android library archive. BrainFlow’s AAR packages its Java API and
Android native libraries together. Download
brainflow-android.aar from release 5.23.0,
copy it into app/libs, and add this to your app’s Groovy build.gradle:
dependencies {
    implementation files('libs/brainflow-android.aar')
}
Use minSdk = 31 or higher with this prebuilt package: its native libraries
require Android 12 or newer. The bundled example artifact includes arm64-v8a,
armeabi-v7a, x86, and x86_64. That makes it convenient for development;
ABI splits or an Android App Bundle can reduce downloads for your own app.
The Android installation guide
also covers rebuilding the native package when you need to change BrainFlow itself.
3. Request Bluetooth Permissions
The example declares its BLE requirements in
AndroidManifest.xml:
<uses-feature android:name="android.hardware.bluetooth_le"
    android:required="true" />

<uses-permission android:name="android.permission.BLUETOOTH_SCAN"
    android:usesPermissionFlags="neverForLocation" />
<uses-permission android:name="android.permission.BLUETOOTH_CONNECT" />
Android 12 and newer also require runtime approval. MainActivity checks these
permissions, requests any missing approval, and resumes connection after the
user grants access. Its permission request is:
requestPermissions(
        new String[] {
                Manifest.permission.BLUETOOTH_SCAN,
                Manifest.permission.BLUETOOTH_CONNECT
        },
        BLUETOOTH_PERMISSION_REQUEST);
Wait for the permission result before preparing a BLE board. The
neverForLocation flag fits this example because it does not derive physical
location from scans; use it only when that is also true of your app. See Android’s
Bluetooth permission guide
for the full rules.
4. Connect Using the Familiar BrainFlow API
Here is the core of the example’s Muse S Athena configuration:
import brainflow.BoardIds;
import brainflow.BoardShim;
import brainflow.BrainFlowInputParams;
import brainflow.BrainFlowPresets;

BrainFlowInputParams params = new BrainFlowInputParams();
params.timeout = 20;
params.other_info = "preset=p21;low_latency=true";
// Optional: params.serial_number = "MuseS-XXXX";

int boardId = BoardIds.MUSE_S_ATHENA_BOARD.get_code();
BoardShim board = new BoardShim(boardId, params);
board.prepare_session();
board.start_stream(45000);
BrainFlowInputParams supplies discovery and device settings. prepare_session()
finds and prepares the headset; start_stream() starts acquisition into
BrainFlow’s buffer. The 45000 argument is buffer capacity in samples, not a
sampling rate. The Muse device setting p21 selects a four-channel EEG stream,
and the Athena profile also enables low-latency mode. Muse 2 and Muse S use their
own board IDs with preset=p21.
In the app, these calls run on a single ScheduledExecutorService, alongside
polling and cleanup. This keeps potentially slow native calls off the UI thread
and prevents a disconnect from racing a data read. The snippet above shows the
connection sequence; reuse the lifecycle handling in
MainActivity.java
when integrating it.
5. Read EEG and Movement Data
BrainFlow groups streams into presets. For these Muse profiles, EEG is in
DEFAULT_PRESET, while acceleration is in AUXILIARY_PRESET:
int eegRate = BoardShim.get_sampling_rate(boardId);
int[] eegRows = BoardShim.get_eeg_channels(boardId);

BrainFlowPresets motionPreset = BrainFlowPresets.AUXILIARY_PRESET;
int[] xyzRows = BoardShim.get_accel_channels(boardId, motionPreset);
int motionRate = BoardShim.get_sampling_rate(boardId, motionPreset);

// Repeat on the worker while streaming.
double[][] eeg = board.get_board_data();
double[][] motion = board.get_board_data(motionPreset);
The matrices use data[row][sample]. Ask BrainFlow for the channel rows and
sampling rate for each preset, and check that a batch contains samples before
indexing it. A Muse device setting such as p21 configures the headset; a
BrainFlow preset selects which returned stream you read.
The app drains new batches roughly every 250 milliseconds. get_board_data()
removes the samples it returns, so use one reader and distribute its batches to
your app’s consumers. get_current_board_data() is available when you need a
snapshot without draining the buffer. Polling and screen refresh rates are
separate from the sensor’s sampling rate.
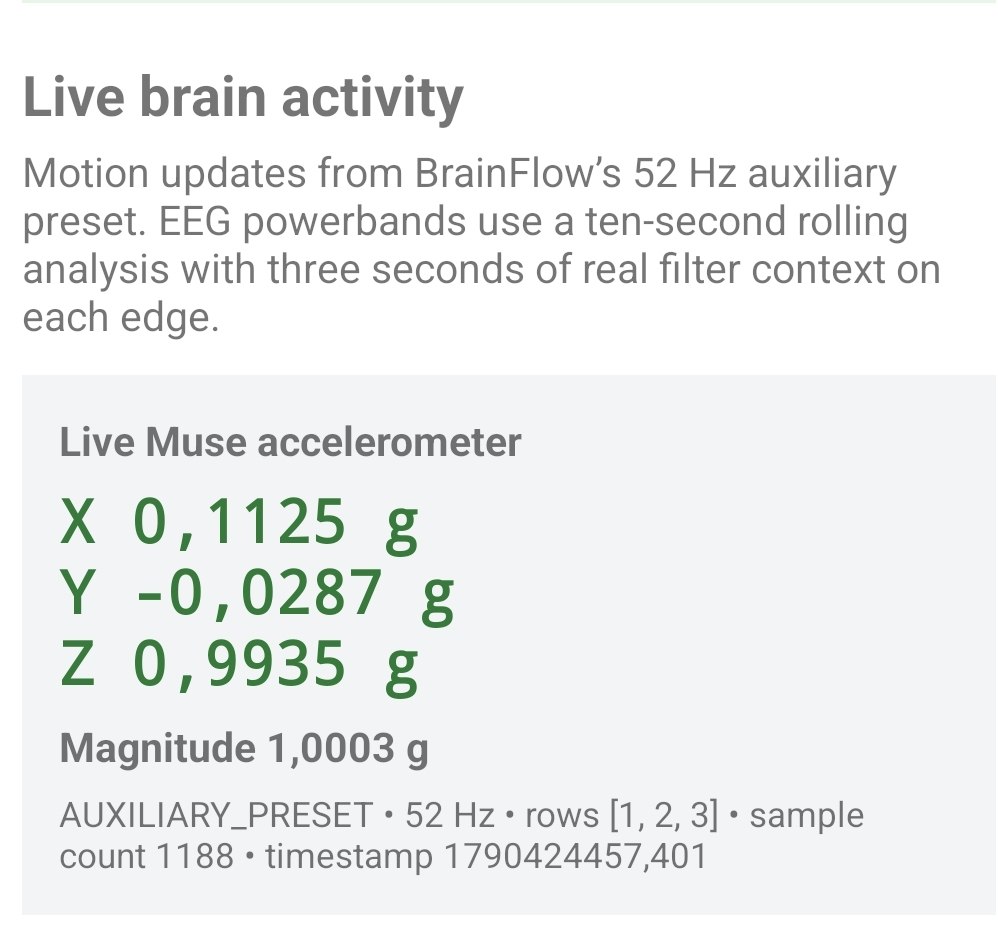
AUXILIARY_PRESET at 52 Hz. The panel shows
all three axes, their combined magnitude, the sample count, and a timestamp.
Tap the screenshot to view it at full size.
6. Turn Samples into Power Bands
The example keeps 16 seconds of EEG in RollingBoardBuffer. It removes the DC
offset, applies 50 Hz and 60 Hz band-stop filters and a 2–45 Hz band-pass filter,
then trims three seconds from each end. BrainFlow calculates delta, theta,
alpha, beta, and gamma power from the central ten seconds.
Filtering a short window can create artifacts at its edges. Keeping real samples on both sides and trimming after filtering reduces their effect on the analysis. That explains the initial 16-second wait and the three seconds of extra delay between the newest sample and the end of the analyzed window.
BrainFlowBandPowerAnalyzer.java
contains the BrainFlow filter and band-power calls;
EdgeSafeEegWindow.java
handles trimming. BandPowerPlotView displays the five traces. These small
classes provide a starting point for adding your own processing or visualization.
7. Stop and Release the Session
Cleanup belongs on the same worker as connection and reads. Cancel polling, stop the stream if it started, and always attempt to release the session:
try {
    if (streamStarted) {
        board.stop_stream();
    }
} finally {
    board.release_session();
}
Here, streamStarted records whether start_stream() succeeded. The example’s
cleanupBoard() also handles partially completed connections and logs cleanup
errors. It is used for disconnects, failed connections, streaming errors, and
activity destruction. The example is designed for use with the app open;
continuous background recording needs its own Android service lifecycle.
Take It Beyond Muse
To adapt the app to another supported BLE device, add its BoardIds value and
connection parameters, then query its channel layout and available presets.
Adjust the UI and filters to its data: not every board has Muse’s accelerometer
preset or sampling rate.
For a TCP/IP device, configure the board-specific IP address, port, and protocol as documented for that board. Add the network permissions to the app manifest:
<uses-permission android:name="android.permission.INTERNET" />
<uses-permission android:name="android.permission.ACCESS_NETWORK_STATE" />
<uses-permission android:name="android.permission.ACCESS_LOCAL_NETWORK" />
Replace the Muse launcher’s Bluetooth checks with the network connection flow,
make the BLE hardware requirement optional or remove it for a network-only app,
and ensure the phone can reach the board. INTERNET and ACCESS_NETWORK_STATE
are install-time permissions. Because this example targets API 37, a network
adaptation running on Android 17 or newer must also check and request
ACCESS_LOCAL_NETWORK before opening a connection to a LAN device. Guard that
runtime request by the phone’s Android version. See Android’s
local-network permission guide
for the version-specific behavior. The BrainFlow session and data-reading pattern
stays the same. Serial-port boards remain outside Android support.
If your Muse is not discovered, check the selected model, close other headset clients, confirm Nearby devices access, and try its exact advertised name. If connection succeeds but no samples arrive, inspect the app’s event log and verify the headset model and configuration.
Android has spent a long time on our list. We are glad to finally share a working starting point that you can build, inspect, and adapt. Clone BrainFlowAndroidTest, try it with your device, and tell us what you build. When reporting results, include the board model, phone, Android version, and BrainFlow version so the next developer can learn from your setup.
Android is a trademark of Google LLC. The Android robot is reproduced or modified from work created and shared by Google and used according to terms described in the Creative Commons 3.0 Attribution License.